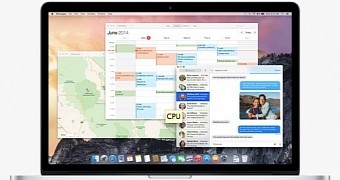
One of the hottest and widely anticipated Apple product launches of this year is OS X Yosemite, the eleventh major release of the Mac operating system.
With a fair amount of certainty we can say the OS is just around the corner. Apple said it would deploy it in fall, and with the incoming event on Thursday we trust that they’ll want to launch it with a bang, not afterwards with a boring press release and pictures.
How to prepare
It’s always a good idea to get your Mac cleansed and ready to go for the upgrade to a major new release of OS X.
So you should consider following these guidelines if you want a hassle-free, smooth transition to the new OS this week or anytime that Apple feels like launching it (or anytime you feel like installing it). Here we go.
Prerequisites
First thing you need to check is your compatibility. If you own one of the Macs listed here, you’re almost certainly eligible for the upgrade:
iMac (Mid 2007 or newer) MacBook Air (Late 2008 or newer) MacBook (Late 2008 Aluminum, or Early 2009 or newer) Mac mini (Early 2009 or newer) MacBook Pro (Mid/Late 2007 or newer) Mac Pro (Early 2008 or newer) Xserve (Early 2009)
I say “almost” because you also need a few other minimum requirements, such as Mac OS X v10.6.8 aka Snow Leopard or later. We hear Mavericks provides an even better transition – not surprisingly, since the two OSes as one generation apart – so consider making the jump to Mavericks first if you can. It’s a free download for anyone with the Mac App Store installed on their Mac, and so will be Yosemite for that matter.
Another thing you’ll need to check (though if you don’t have this then you obviously can’t use Mavericks either) is the amount of RAM installed on your system. Apple says a minimum of 2GB is required, but I can tell you right now that 4GB will take you to more places with Yosemite. Guaranteed.
Storage-wise, you must have at least 8GB of free disk space to install OS X v10.10. Like with the RAM, it’s best if you have much more than that. And you shouldn’t be rolling with only a couple of free gigs of space anyway. Get cleaning, lazy!
Don’t forget to back up
Some people will tell you this is just a precaution, that you shouldn’t bother your head with it. This couldn’t be farther from the truth. Backing up your entire system is crucial in the face of a full OS upgrade, so don’t think for a second that it’s not worth wasting your time. Especially if you hold years’ worth of family photos and videos on that Mac.
Grab an external drive or even a USB flash drive with enough space on it and do a Time Machine backup to which you can restore in case something goes amiss during the installation process.
If you need the actual steps for that, here they are:
Launch Time Machine, either from the System Preferences pane or from the menubar (if you haven’t removed its icon), turn backups on using the big switch on the left of Time Machine’s UI, select a disk in the right pane (choose that external drive I mentioned earlier), and start the backup. Wait for it to finish and you’ll be good to go.
Also worth considering is removing any apps that you know you don’t use. Whenever a new OS comes along, it’s bound to conflict with some apps that haven’t been optimized by their respective developers. To further ensure smooth sailing, just uninstall those.
Looking forward to your upgrade stories in the comments below. Hope they’re all positive, though history has shown that people rarely take to the comments when everything is A-OK.

 14 DAY TRIAL //